Building a Telegram Bot with ZettaBlock GraphQL API

Intro
Hello everyone, In this blog, I am going to show you how I build a Telegram bot and Integrated it with the GraphQL API that I made using ZettaBlock. We are going to learn about what is ZettaBlock and how we can use it to build our Web2 and Web3 Applications very easily and how it can help in our development process.
So let's learn a little bit about ZettaBlock before starting our bot development process.
What is ZettaBlock?
Zettablock is a decentralized platform that utilizes blockchain technology to provide a secure, transparent, and scalable solution for data storage and management. It allows users to store and manage data in a decentralized manner, without the need for a central authority or server. Zettablock utilizes a unique GraphQL API, which allows developers to easily build and integrate applications with the platform. The platform also offers robust security measures, including encryption and proof of authenticity, to ensure the integrity and confidentiality of stored data. Overall, Zettablock provides a powerful and flexible solution for managing and storing data in a decentralized manner.
It can be used to index both off-chain and on-chain data with the help of GraphQL API and SQL Queries. ZettaBlock supports the following chains: Ethereum, Polygon, Arbitrum, Aptos, Solana, Ripple XRP, and IoTex. And more are coming soon.
To learn more about the platform you can visit their website 👉 Zettablock.com
How Zettablock works?
The image shown below will help you understand how it works

Note: This image belongs to Zettablock Developer Docs
The Zettablock platform is powered by a distributed network of nodes, each of which stores a copy of the data on the platform. When data is added to the platform, it is encrypted and distributed among the nodes in the network. This ensures that the data is secure and cannot be accessed or modified without the proper authorization.
To access or modify the data on the platform, users can utilize the Zettablock GraphQL API. This API allows developers to build and integrate applications with the platform, allowing users to easily store, retrieve, and manipulate data on the platform.
This is just the overview of what is Zettablock and how it works. We will learn more about it during our bot development process, which we are going to start now.
Prerequisites
You should have NodeJS v14 or greater.
You should have a basic understanding of the following:
At least you must have an understanding of Javascript to understand it better.
Also, I am going to use typescript just to enable type-checking. But this is optional. I will explain what I am doing with it during the process.
You can visit Zettablock docs for GraphQL and SQL Beginners. There they have mentioned some resources where you can learn about both of them and also some basic queries are also there.
Basic Setup
First, I am going to create a repository named Zettablock and open it in VS Code. You can use any IDE of your choice.
Then you need to run the following command to make a package.json file which will contain the name of our development packages and some important commands.
npm init
// or
npm init --y
Installing Dependencies/Packages
Now run the following command to install are necessary packages:
Using Yarn
yarn add dotenv telegraf typescript ts-node @types/node nodemon axios
Using npm
npm install dotenv telegraf typescript ts-node @types/node nodemon axios
Getting our Bot token from Telegram
Telegram provides us a way to create a telegram bot easily with the help of the BotFather bot. You can think of it as a super bot that is provided by telegram that can help you to create new bots and manage your bots.
Just write the username BotFather telegram search bar and you will find this bot 👇

Select the one with ☑. That is the original one.
now press the start button and it will show you some commands like /newbot
and /mybot. Press on the /newbot which will create the new bot for you.

Now it will ask you some questions about the name of the bot and the username that you want to assign to it. Just provide those details. I am giving ENS_RESOLVER as a name and ENS_RESOLVER_BOT as a username, which i will explain later why I named it this.
After giving those details, you will get your bot token in a message like this
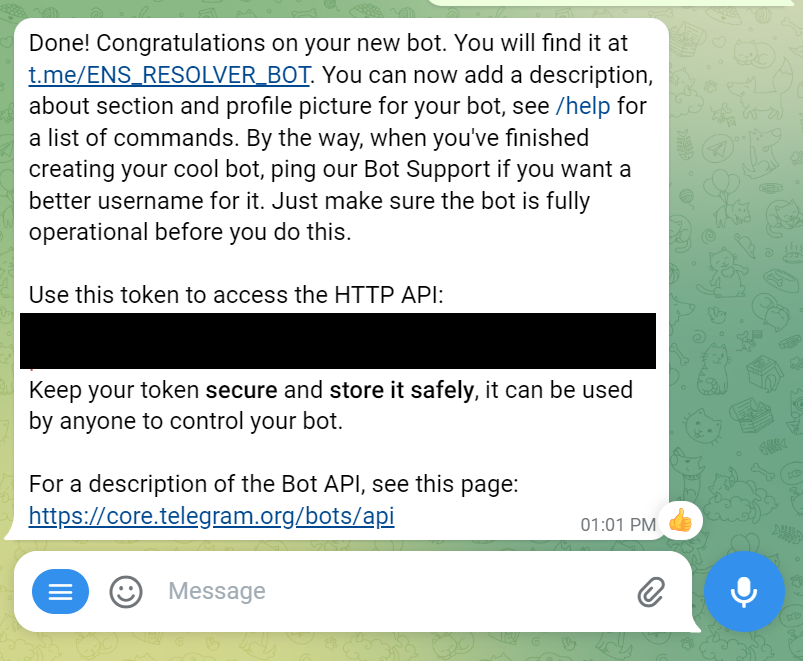
The shaded region in the image contains your bot token that we are going to use later.
Starting project
Now create a new file within the same directory with the .ts extension. I am going to create bot.ts. This file will contain our code for the telegram bot.
Write the following code in the bot.ts file:
// importing packages
import { Telegraf } from "telegraf";
import dotenv from "dotenv";

dotenv.config();

// Creating bot object using Telegraf class and passing Bot token as a string
const bot = new Telegraf(process.env.BOT_TOKEN  as string);

// This will be invoked when we write /start command on telegram bot
bot.start((ctx)=>{
    ctx.reply("Welcome to bot");
})

// This wiil be invoked on when we write /help command
bot.help((ctx)=>{
    ctx.reply("This is help command");
})

// this will make our bot ready for the
bot.launch();
In the above code, we are importing packages like telegraf and dotenv first that we will use in our files.
To create the bot object which will help us to use various commands and functions to interact with user messages, we are using Telegraf() constructor and passing it a bot token.
The token is very crucial since it gives access of our bot to anybody. That is why we need to store it somewhere safe where only we can access it. Nodejs provide us with a way to store these types of private values in a .env file. we can access those variables using process.env.VARIABLE_NAME in our Nodejs scripts.
To create a .env file just create a file with name .env and write the following code in it and paste your bot token as a value:
BOT_TOKEN='Your Bot Token from telegram'
The token that is passed to Telegraf() constructor should be a string that will give us a typescript error if we pass it like process.env.BOT_TOKEN. We need to force it as a string which we can do with as keyword and then we will write the type we want to assign it. Hence the argument will look like this process.env.BOT_TOKEN as string
We also have to launch our bot first so that users can start interacting with it easily. Which we are doing at the end of the file with bot.launch() the method inside the bot object.
bot.start() and bot.help() are also other two methods of the bot object that will react to the /start and /help commands of the user. Both of these methods take the arrow function as an argument that contains the context (i.e ctx) object as a parameter. This context object will help us interact with the users.
Let's test the bot.
Open your terminal and write the following command:
npx nodemon bot.ts
This will start the server. The Nodemon is a tool that will look for the changes in the file and will restart the server after every change.
Once the server has been started, go to BotFather telegram where you created the bot and press this link on the message

This will take you to your bot where you can start experimenting with it.
Just write your commands /start and /help to check if it is working properly or not.

And we can see it is working.
Great! now let's go to ZettaBlock and create the API that we will use with our bot.
Creating ZettaBlock GraphQL API
Step 1: visit this link 👉 ZettaBlock APP and create an account.
Step 2: You will be redirected to this page 👇

Click on the create button in the top right corner and select the query builder option which will help to create the query.
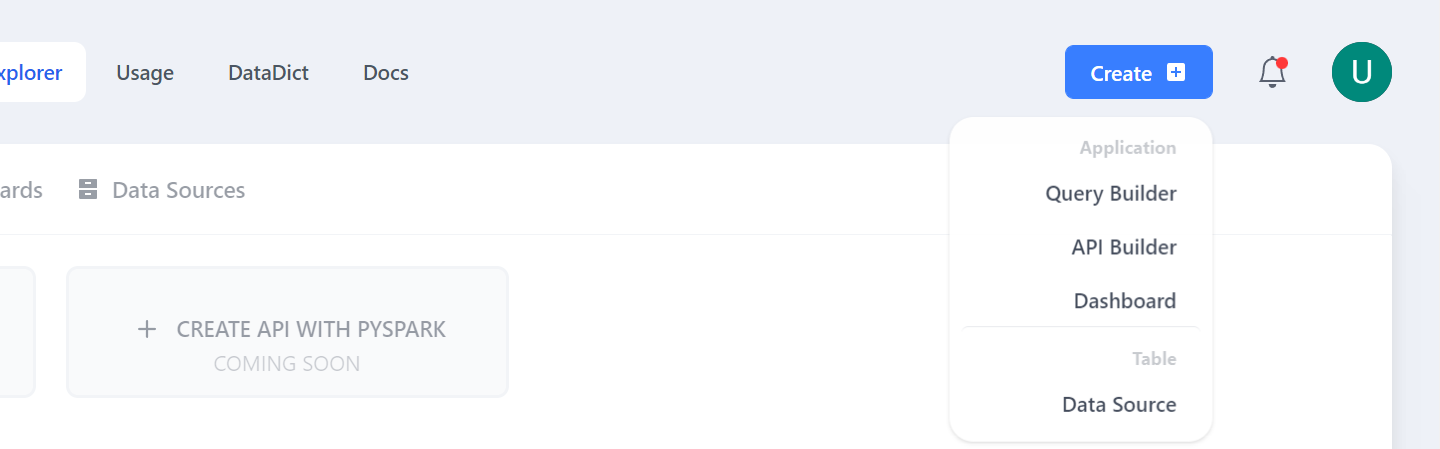
you will be redirected to the query builder page shown in the image below.
Step 3: Select the database and table you want to create your command with. I am using ens database and ens.ethereum_ens_name_registrations table of it.

Now why ENS?
The Ethereum Name Service (ENS) is a distributed, open, and extensible naming system based on the Ethereum blockchain. ENS's job is to map human-readable names like 'Alice. eth' to machine-readable identifiers such as Ethereum addresses, other cryptocurrency addresses, content hashes, and metadata.
That is why I also choose the bot name ENS_RESOLVER.
Step 4: Now write your SQL query in the write section of the page. I am going to write the following query
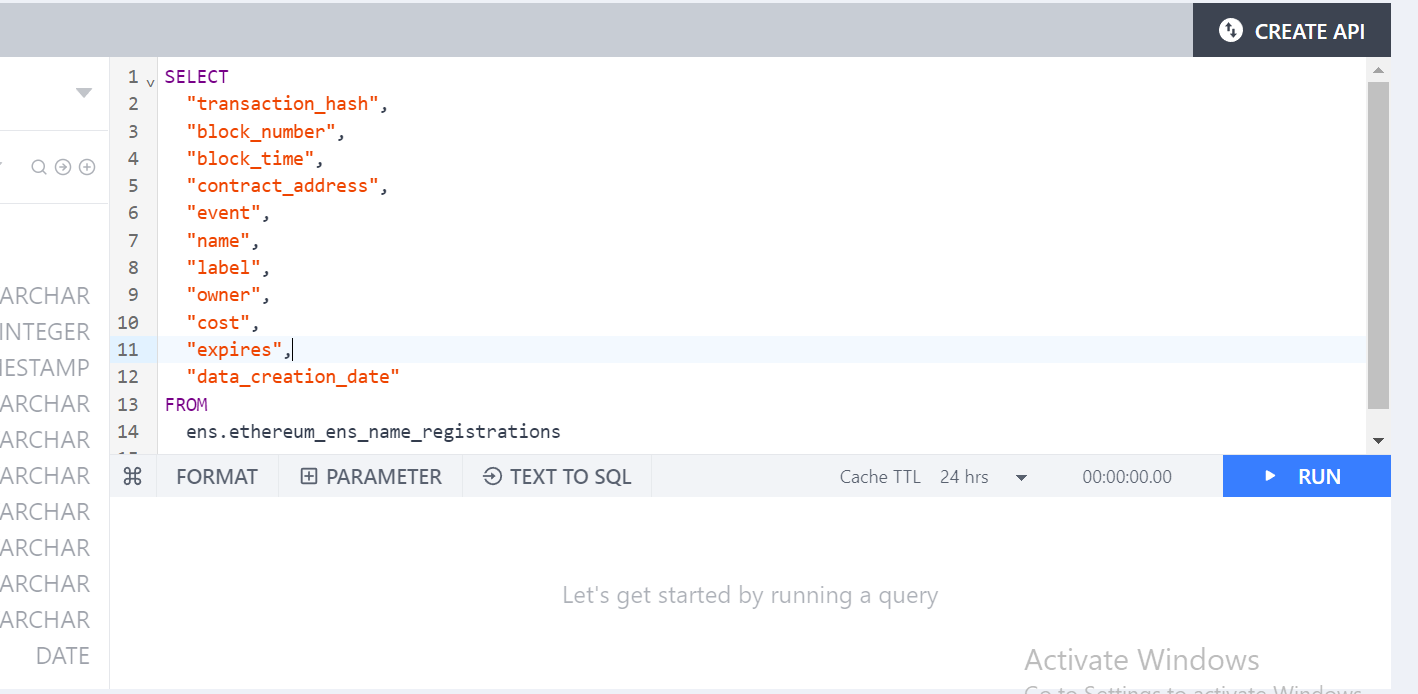
SELECT
  "transaction_hash",
  "block_number",
  "block_time",
  "contract_address",
  "event",
  "name",
  "label",
  "owner",
  "cost",
  "expires",
  "data_creation_date"
FROM
  ens.ethereum_ens_name_registrations
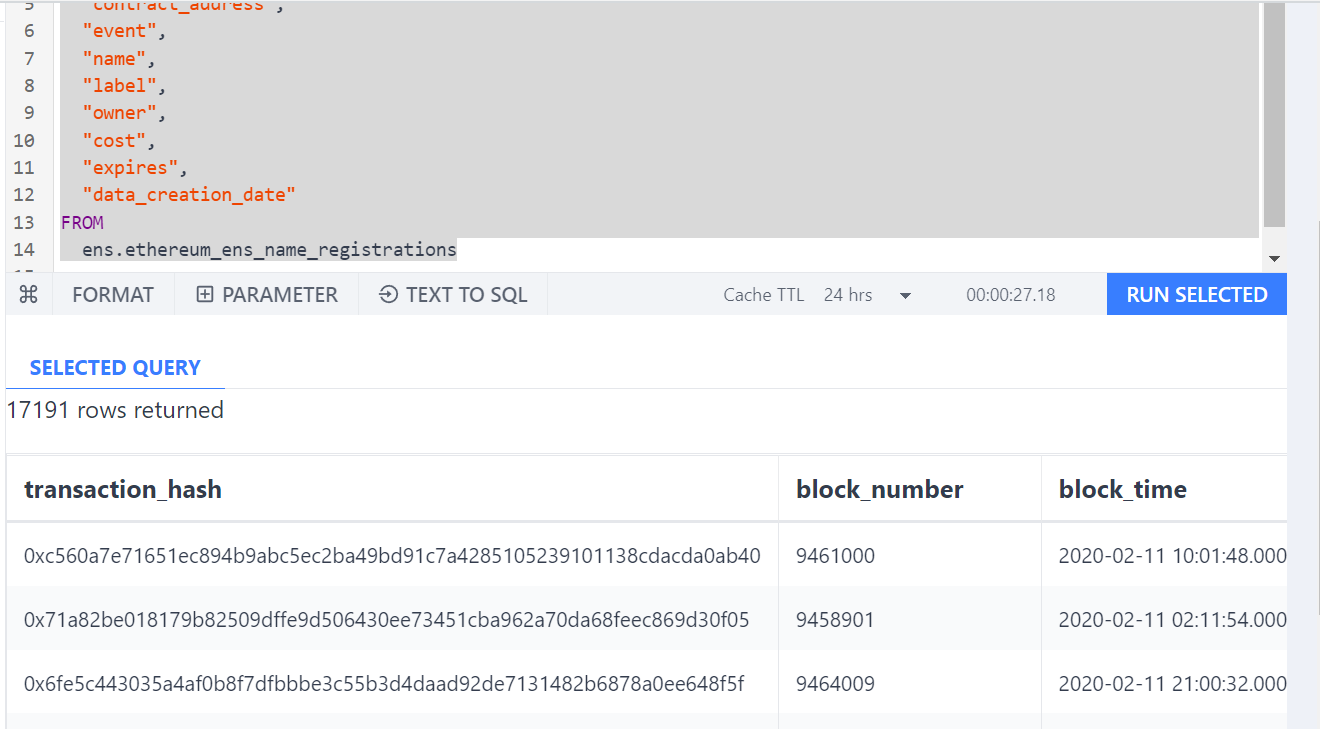
Step 5: Run the command first by pressing the Run Selected button in the right bottom corner. It will give you the results After some time. Just wait for the counter to finish.
After finishing, you will get the results like this which means the SQL query we have written is correct.
Step 6: Now press the Create API Button. You will be prompted whether you want to create the API with the following query. Just press yes and you will be redirected to another page. Now fill in the various options that have been given to you and you are good to go.

Now press on the create API button again in the top right corner. You will be redirected again to the next page.
Step 7: Now on this page, you will see some info about your API
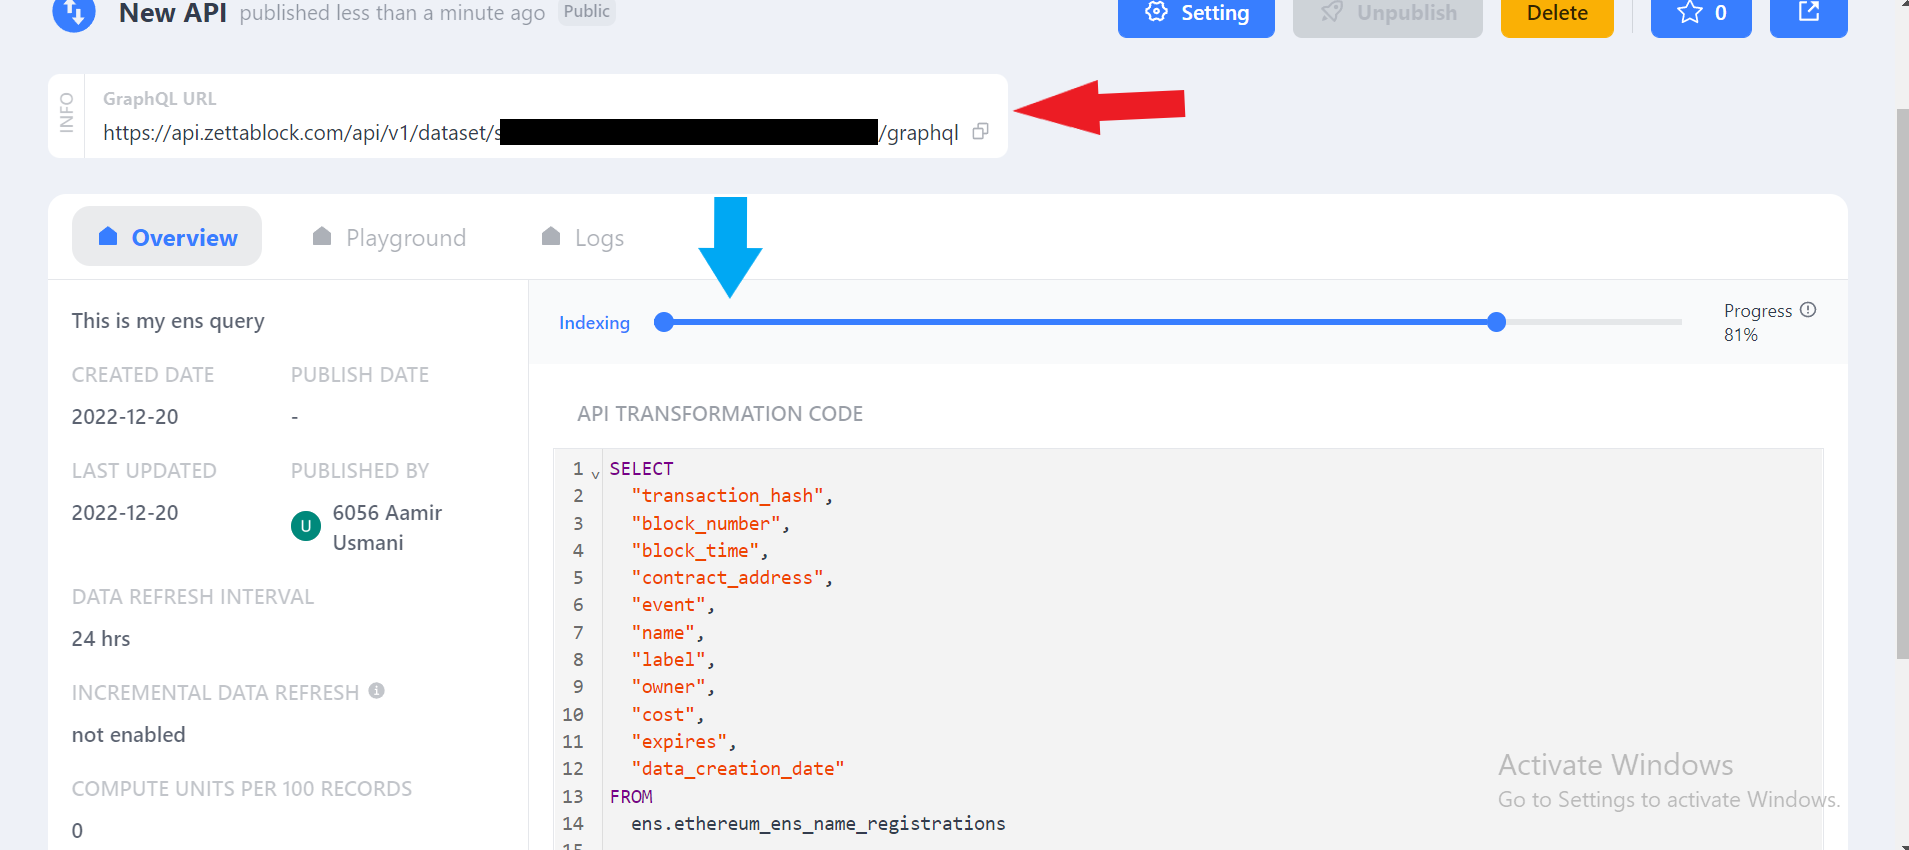
The red arrow in the above image shows your GraphQL URL that you will use to query data with a simple GraphQL Query. The Blue arrow shows a progress bar. It just shows that the latest data is being indexed to show you the latest information.
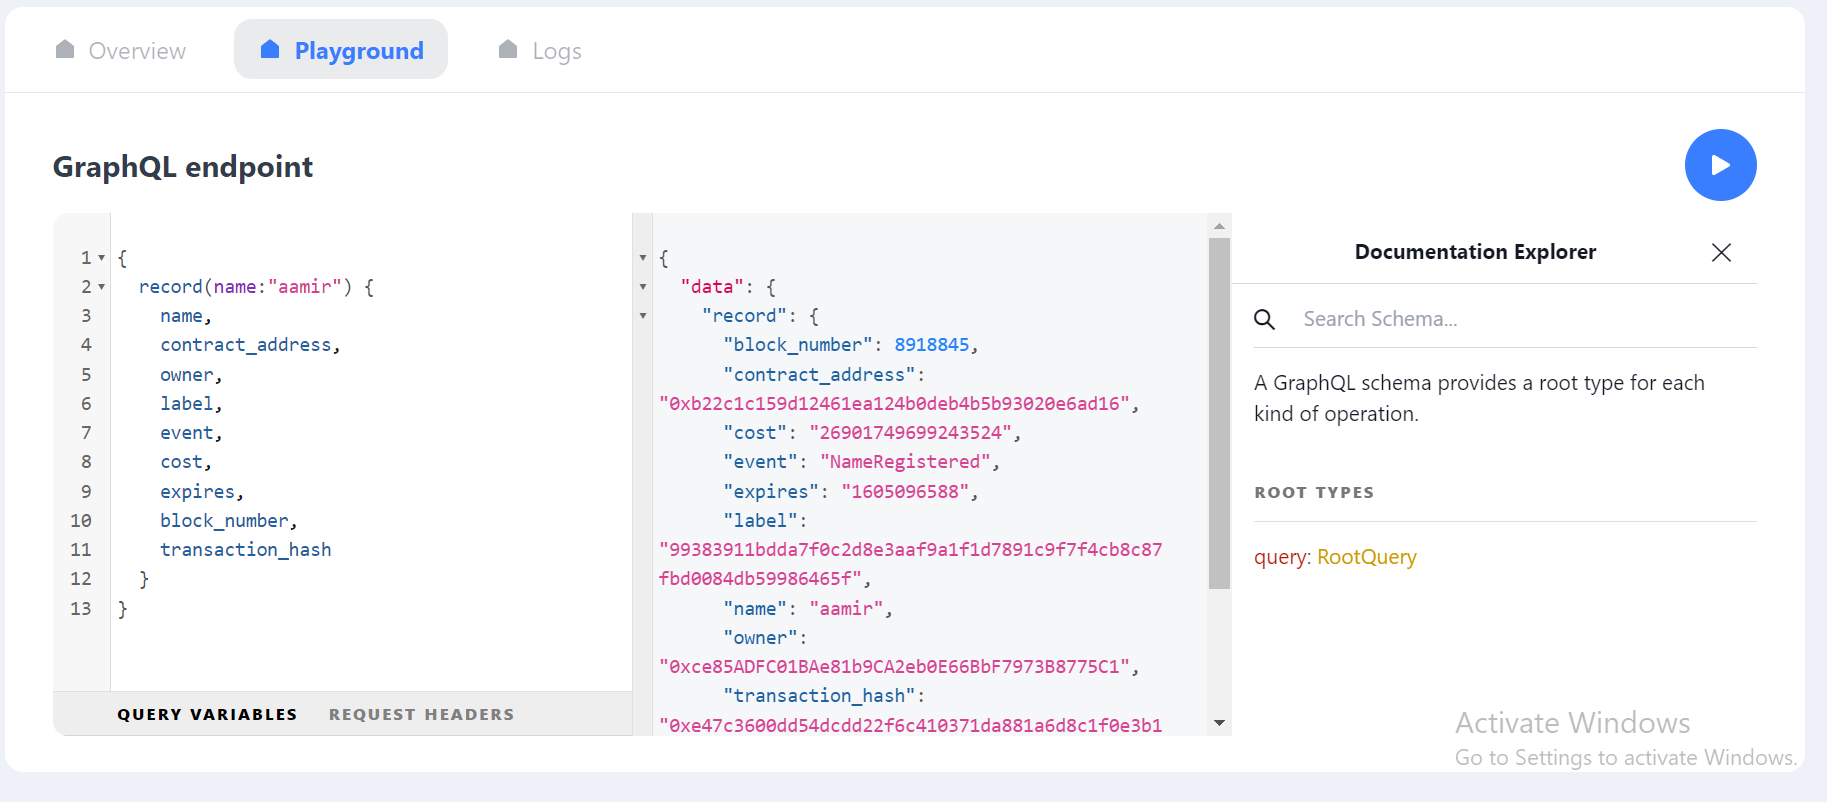
After this indexing, you can go to the playground option on the right side of the overview tab and you can start playing with your API.
I just ran the following GraphQL query and it fetched me the result.
Now that our GraphQL API is ready, we can start using it with our bot.
But for using it we need our API key and APP ID.
To access the API key press the copy button on the URL shown in the above image
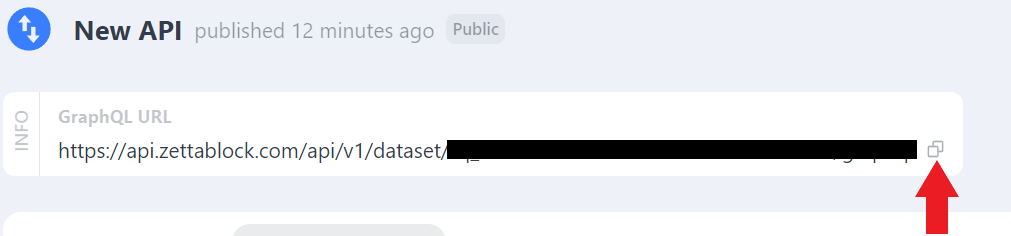
The following prompt will open
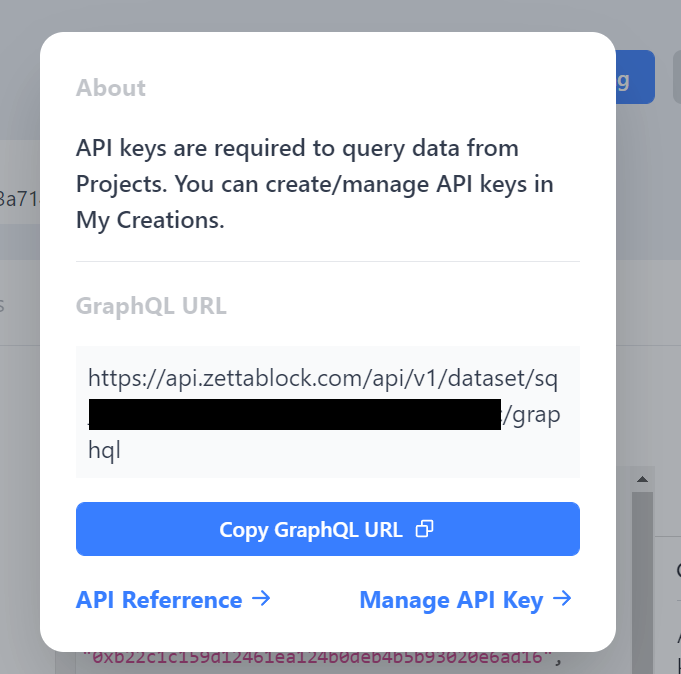
Just press the Manage API key button and you will be redirected to the page where you can copy your API key.
The black shaded area in the above image contains your APP ID.
Copy those two in your .env file too.
BOT_TOKEN="bot token goes here"
ZETTABLOCK_API_KEY="api key"
ZETTABLOCK_APP_ID="app id"
Adding custom command
We have almost everything ready to complete our bot. Now I want to add a custom command as we get /start and /help . How can we do that with telegraf .
Well there is one more method of the Telegraf class which is command() , which I can use with my bot object like bot.command() .
This method takes two parameters. First is the name of the command as a string and another one is a callback function which is the same as we get in our above mentioned /start and /help commands.
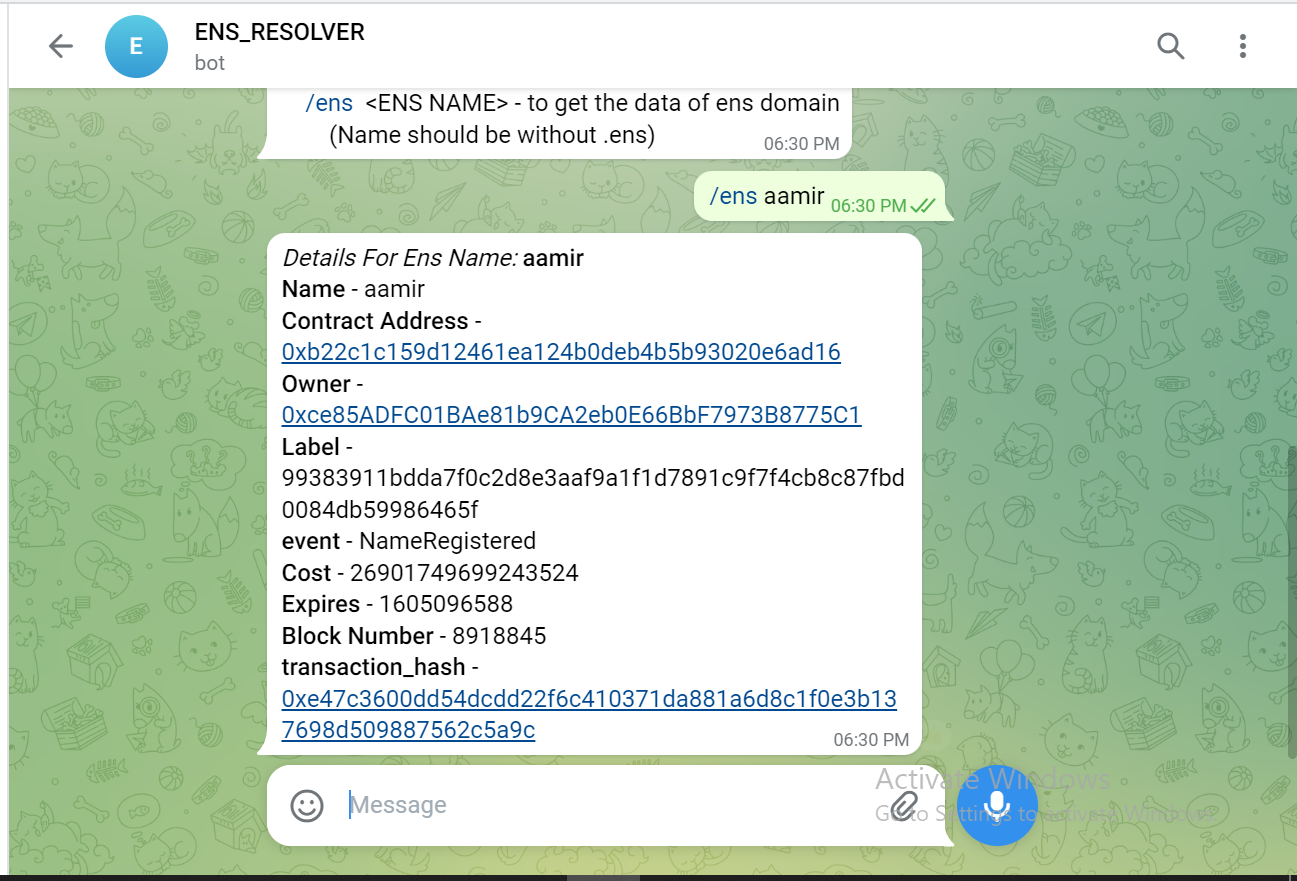
What I want is I want to give the users to pass the ENS name as input with my custom command like /ens [name] and in return, they get output-like details that are related to their ens names.
To do that I am going to create a custom command name /ens which will take input from the user and send them their details back. Now I am going to paste here my updated bot.ts file and will try to explain everything. So here is my code
import { Telegraf } from "telegraf";
import dotenv from "dotenv";
import requestDataFromEns from "./request";

dotenv.config();

const bot = new Telegraf(process.env.BOT_TOKEN  as string);
const helpMessage = `📄 Here is a list of useful commands
    /help - for help
    /start - to start the bot
    /ens  <ENS NAME> - to get the data of ens domain
        (Name should be without .ens)
`;

bot.start((ctx)=>{
    ctx.reply("Welcome to ENS Resolver Bot: " + ctx.message.from.username)
    ctx.reply(helpMessage);
})

bot.command(['ens', "ENS", "Ens", "eNs"],async (ctx)=>{
    const textArray = ctx.message.text.split(" ");
    const command = textArray.shift();
    const ensName = textArray.join(" ") || null;

    if(ensName && textArray.length === 1){
        // to check name doesn't full ens name like aamir.eth
        if(ensName.includes('.')){
            ctx.reply("invalid name");
        }
        const record = await requestDataFromEns(ensName);

        // to check if the returned record has value or not
        if(!record?.transaction_hash){
            return ctx.reply("No record with given Ens");
        }

        // custom message to send with the recieved record
        const messageToSend =
            `<i>Details For Ens Name:</i> <b>${ensName}</b>\n<b>Name</b> -                          ${record!.name}\n<b>Contract Address</b> - <a href='https://etherscan.io/address/${record.contract_address}'>${record!.contract_address}</a>\n<b>Owner</b> - <a href='https://etherscan.io/address/${record.contract_address}'>${record!.owner}</a>\n<b>Label</b> - ${record!.label}\n<b>event</b> - ${record!.event}\n<b>Cost</b> - ${record!.cost}\n<b>Expires</b> - ${record!.expires}\n<b>Block Number</b> - ${record!.block_number}\n<b>transaction_hash</b> - <a href='https://etherscan.io/tx/${record.transaction_hash}'>${record!.transaction_hash}</a>
            `
        // use ctx.replyWithHTML if you want to use html in you message
        // disable_web_page_preview is true so that we don't get the preview
        // of our links.
        ctx.replyWithHTML(messageToSend,{disable_web_page_preview: true})
    }else{
        ctx.reply("Invalid Command! Try again");
    }
})

bot.help((ctx)=>{
    ctx.reply(helpMessage);
})

bot.launch();
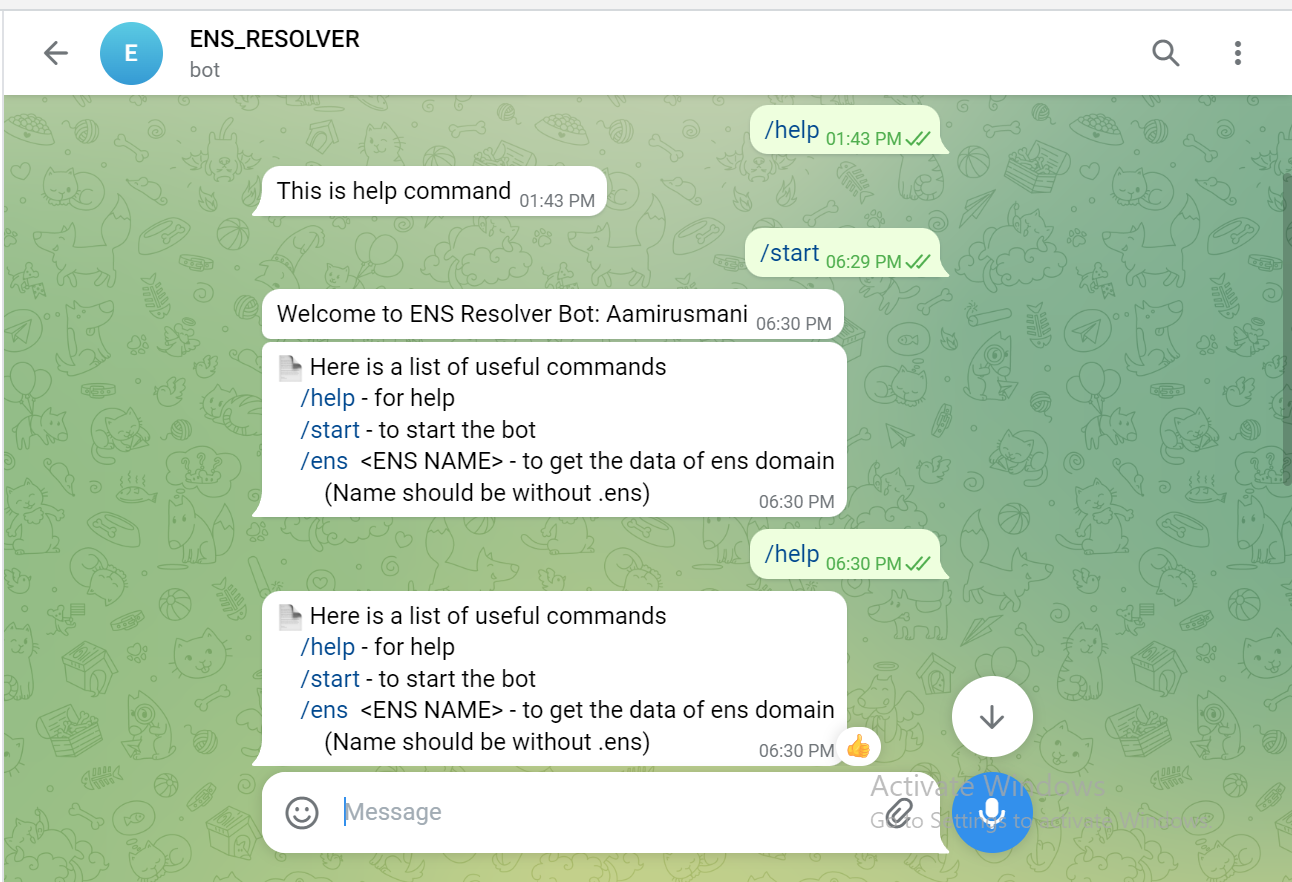
In the above code, I first added the the helpMessage that I want to send every time my users ask for help with /help . I will also send the same message when user write /start for the first time to let them know the all available commands.
Now in bot.start(), there is something like this ctx.message.from.username that I used to reply to the user. This is just the username of the person who sends the input. In fact ctx is a very big object that I cannot paste here, but you can try to console log it. ctx contains other useful properties like the details of the message and many more. In this case, we are not going to look at them because our bot doesn't require all those things. But are free to do that.
Here I created a command with bot.command() and passed it an array. I added this to make sure that there is no confusion about case sensitivity. Users should be able to write /ens or /ENS to get the same result. If you want to use only one value, pass the command name as a string only.
I have made some checks that I have mentioned in the code itself. I want you to look at them before going further.
Now there is one more function that I used which is this requestDataFromEns(ensName) . This is a custom function that I made to request my GraphQL URL for data. I created this in a separate file. This is the file that contains this function.
import axios from 'axios';
import IEnsAPIResponse from './Interfaces/IENSApiResponse';

export default async function requestDataFromEns(ensName: string): (Promise<IEnsAPIResponse|null>){
    const options = {
        method: 'POST',
        url: `https://api.zettablock.com/api/v1/dataset/${process.env.ZETTABLOCK_APP_ID}/graphql`,
        headers: {accept: 'application/json', 'content-type': 'application/json',"X-API-KEY": process.env.ZETTABLOCK_API_KEY},
        data: { query: `
            {
                record(name:"${ensName}") {
                  name,
                  contract_address,
                  owner,
                  label,
                  event,
                  cost,
                  expires,
                  block_number,
                  transaction_hash
                }
            }
            `
            }
        };

        const data = await axios
        .request(options)
        .then(function (response) {
            return response.data;
        })
        .catch(function (error) {
            console.error(error);
        });

        return data.data.record;
}
In this file first I imported an axios which I am going to use to make requests. In the file, I also imported the IEnsAPIResponse which is an interface that I created just to make sure that my function returns the same output every time.
If you don't know about Interfaces, just think of them as a blueprint that I can add to my variables and objects. This blueprint will tell me what kind of data my variable or object contains. It is just an extra functionality that typescript provides use to ensure type checking and to make our code bug free. This is the Interface that I used 👇
export default interface IEnsAPIResponse{
    name: string
    contract_address: string
    owner: string
    label: string
    event: string
    cost: string
    expires: string
    block_number: number
    transaction_hash: string
}
By the way, if you are not familiar with axios , feel free to use any library or you can even use the built-in javascript API to make calls. I use Axios because it's very handy and also doesn't give some weird bugs that we might get with native javascript.
If you go to this link ZettaBlock API Reference, you will find more ways to make requests to the dataset.
If we talk about the structure of the requestDataFromEns function, It is going to accept to username as ensName from the user, which will always be a string and will return the promise that will be in the form of our above-mentioned Interface.
This function contains options that I also copied from ZettaBlock API Reference. I just added my own url that I copied from the ZettaBlock API that we created. And also one more property in the options.headers which is "X-API-KEY" that will contain my API_KEY that we created above.
There is also our query like we make above in our ZettaBlock playground.
And everything is almost the same. I just returned the record from the data property of the object.
And this is it. Our Bot is ready. Now we just need to go to the telegram bot and check if everything is working properly.
Here are the results.
For new /start and /help commands
For /ens command:
For the error when the wrong name is passed:

Bot Video link
If you go to this link 👇 on github, you will also find the video showing the working of the bot
Just scroll down a bit you will find the video and code too.
We just need to deploy it and you are ready to go.
Conclusion
And this is how you build a telegram bot that uses ZettaBlock GraphQL API for indexing data.
If we talk about ZettaBlock, I think what they are doing is very amazing. We know as a developer if we want to build an application built on blockchain and also makes use of centralized databases to store the data, we have to create and manage a separate setup for both. This is such a very complex task and requires a lot of maintenance. This is where ZettaBlock comes in and saves us.
Thank you for reading!
