How to Deploy Any Contract On Any EVM chain using ThirdWeb

Overview
In this Blog Post, we are going to discuss everything you need to know about the new ThirdWeb feature that allows the developers to deploy their smart contracts on any EVM chain available in really easy steps without exposing their private keys or API keys.
Little About ThirdWeb

I am sure most of you are already familiar with what ThirdWeb is but if you don't know about what it is, you can think of it as your one-stop-shop for web3 development tools, resources, and community - all in one place.
ThirdWeb is a complete web3 development framework that provides everything you need to connect your apps and games to decentralized networks.
We will learn some of the features provided by it during this blog post as well. But if you are curious to know more about it, I will highly encourage you to visit their site by clicking here or any of the above links.
What is the new Feature?
Now with the help of ThirdWeb, you can deploy any contract on any EVM chain. There are 700+ chains available there both L2s and L3s. Earlier this used to be around 7 chains. With this, ThirdWeb has become the first chain-agnostic web3 framework.
Not only that they have made improvements in their dashboard. Now you can add any contract to ThirdWebs Dashboard no matter if it was deployed using ThirdWeb or not. These are some of the features that were added:
SDKs for React, JavaScript, Unity, Python & Go
A decentralized storage service that uploads & pins files to IPFS for you
Plug-and-play UI components for frontend applications
If you want to learn more about it go and check out this official blog from ThirdWeb 👉 here
Structure of the Article
This blog post is going to be divided into two sections. Both sections will help you to understand what the new feature is. But in one section you will deploy one of the contracts provided to you on ThirdWeb's Dashboard. For that you don't need to create any project or do any coding.
In the second section, we will code our own contract and deploy it using ThirdWeb's CLI tool.
Section 1: Deploying a contract from ThirdWeb's Explore Section
Step 1:
Go to the 👉ThirdWeb's Explore Page

Step 2:
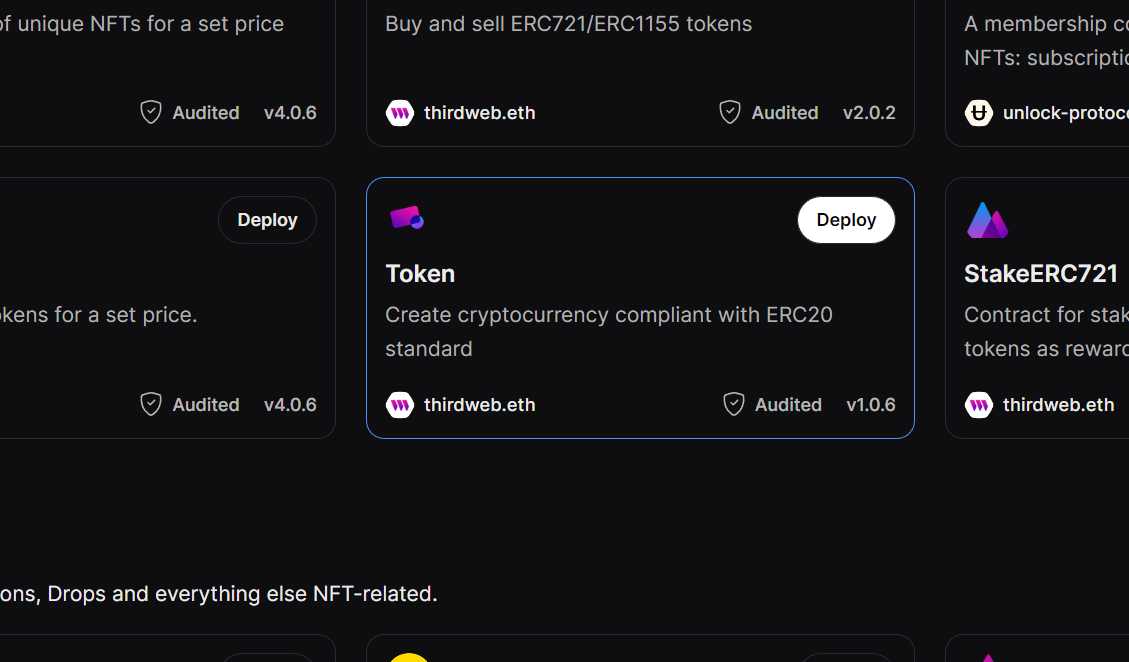
Pick any one of the contracts. I am going to pick this👇 ERC20 Token contract
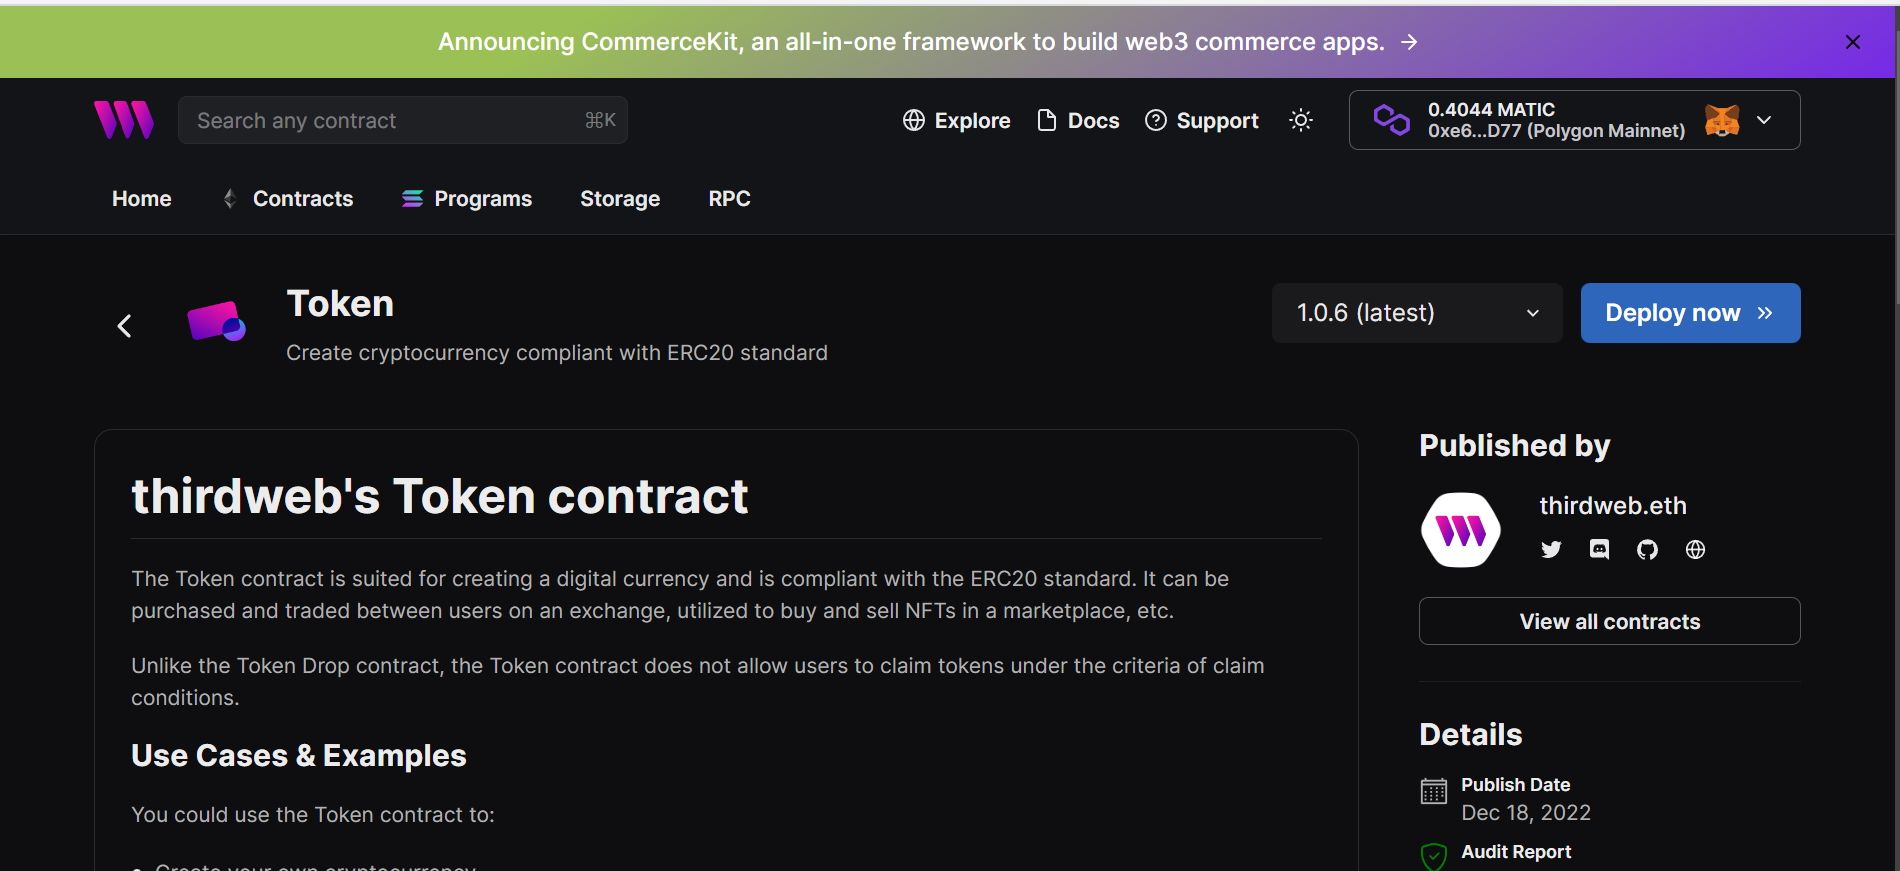
Step 3:
Click on it and you will be redirected to another page. On this page, you can check various functions, events, and even the source code of the various contracts used to create this Contract. Just scroll a little bit and you will find everything. Now click on the deploy button in the top right corner.
You will get a prompt like this 👇

There you can add details for your ERC20 token like name, symbol etc. make sure the Recipient Address is your wallet address.
Step 4:
After filling in those fields, you need to scroll down to the bottom and you will see the deploy button along with the network settings.

I am going to select Polygon Mainnet but you can select anyone of your choice.
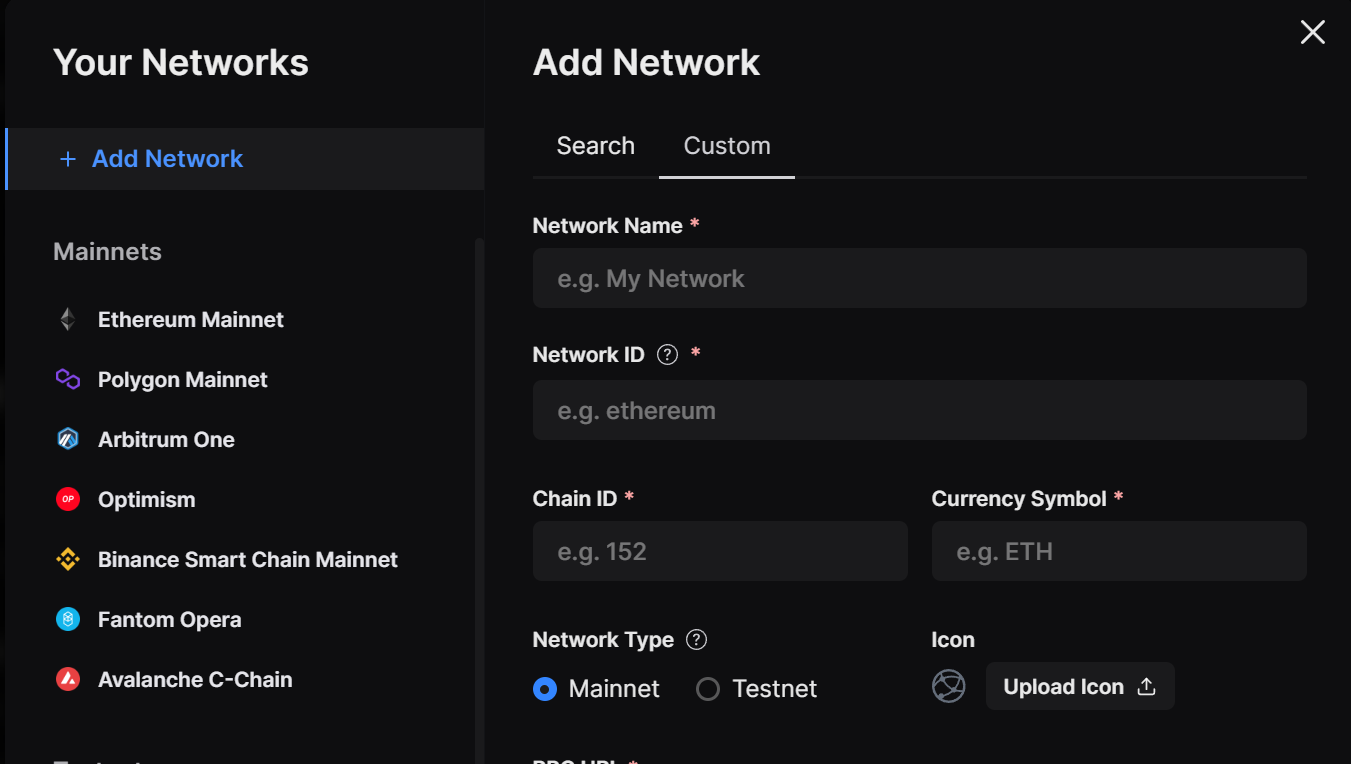
If the network of your choice is not present there, click on configure Networks button and you will get a prompt like this👇

Here you can search for any EVM of your choice. There are almost 700 different EVMs present in it. If you still can't find the network of your choice, click on the custom tab just above the search bar and add the details required like chain id, network name etc. and you will find the network.
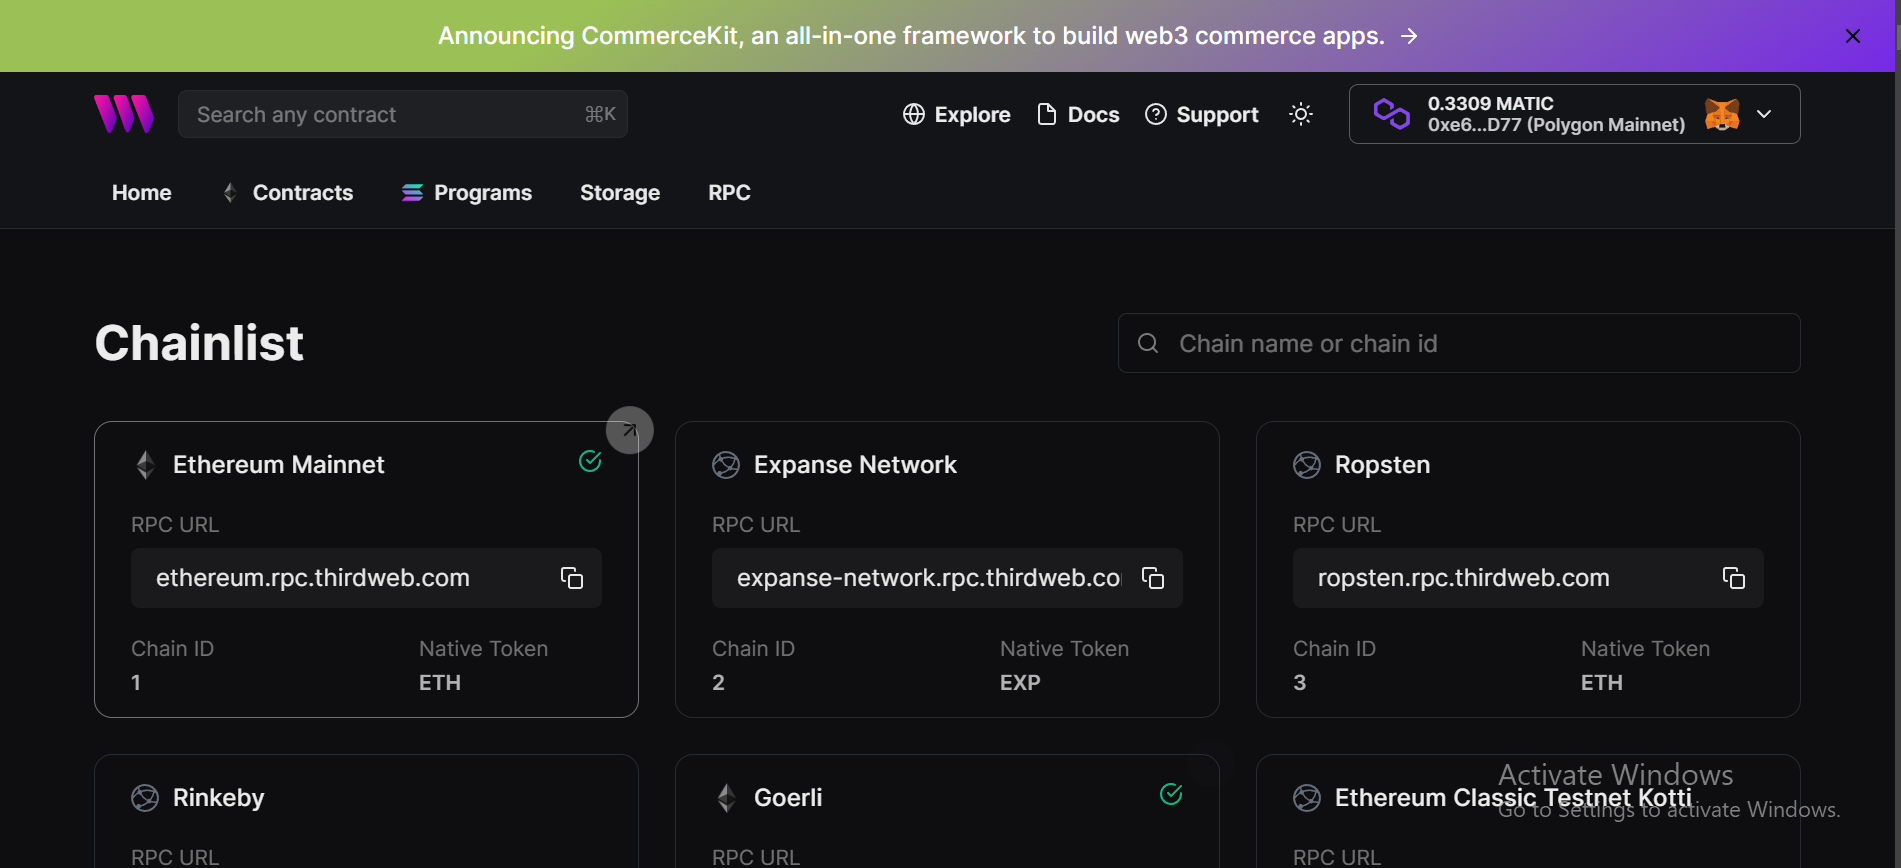
To get the list of Chain IDs and other information go to this👉 link form ThirdWeb
You will see hundreds of chain details on this page. Search for the one you require and copy-paste it.
Step 5:
Once you have selected the network, press on the deploy and your contract will start to deploy.

If everything goes fine, you will get the Metamask popup to confirm the transaction.
Go ahead and confirm it.
Step 6:
Once the transaction is completed, you will be prompted with another confirmation to add your contract to your dashboard.
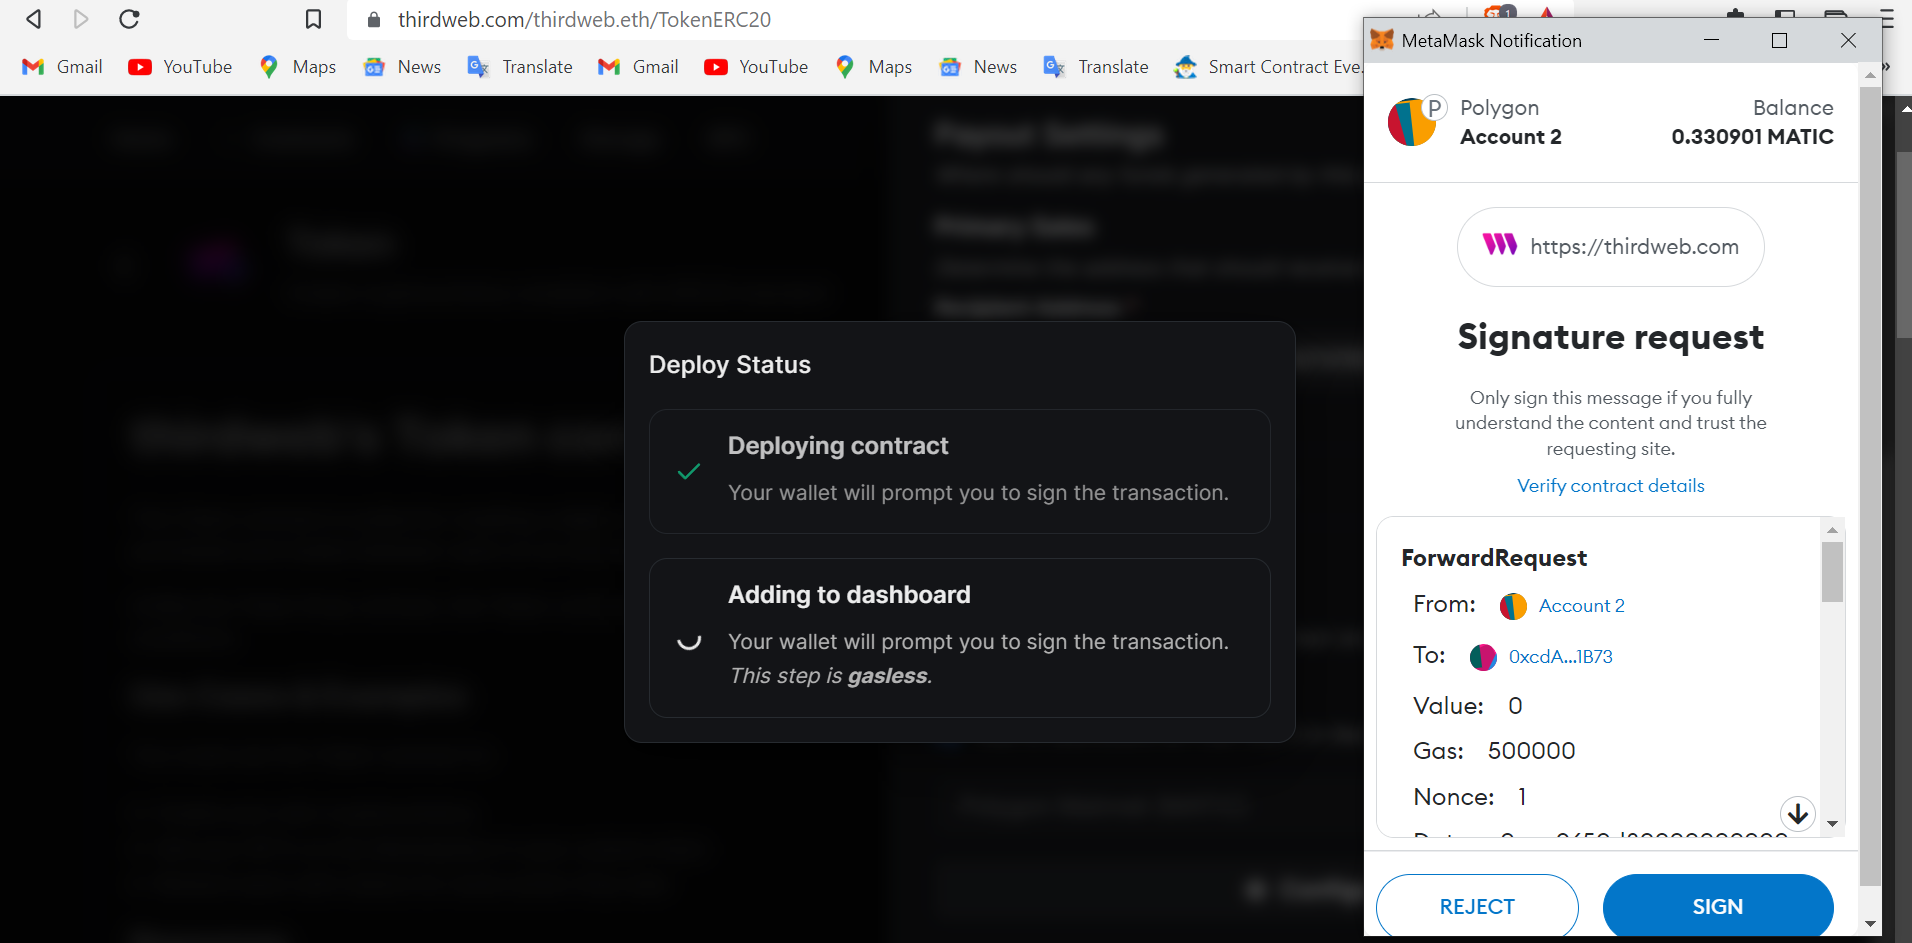
You can click on the sign button.
Note: For this transaction, you don't need to pay any gas fee. You can check that on your Metamask popup screen. ThirdWeb will pay it on your behalf. It just needs your confirmation to add your contract to the dashboard and that is why you need to sign another transaction.
Now once you have done it, you will be redirected to your deployed contract on the ThirdWeb dashboard.

And this is it. You have deployed the smart contract to the POLYGON mainnet.
On this page, you can check for your contract details like Events, Permission and Source code of the contracts.
There is a code, you can go to this tab and you will see how you can import your contract using ThirdWeb SDKs for different languages.

Now let's learn how we can deploy our own contract that we will make using the ThirdWeb CLI tool.
Section 2: Deploying our custom contract with code
In this section, we are going to learn about how we can deploy the custom contract using the ThirdWeb CLI tool. we are going to code in this section.
Prerequisites
- You should have NodeJS v14 or greater installed on your pc.
You should know the following:
Javascript
Nodejs
Solidity
Not some advanced level but at least some basic level of knowledge.
There are some things that we will try to understand on the go.
Creating a simple solidity project
I will try to explain everything so if you already know how to create a simple solidity project go ahead and move to the deploy section.
First, create a folder and open it in your preferred IDE. I am going to use VS Code for it.
Now we are not going to do everything on our own. If you have worked with any local solidity project you will know all of the things we have to do for making a project.
We would require a lot of things and configure a lot of things according to our needs if we want to start from scratch. We don't want to do that for a simple solidity project. So we are going to take a shortcut.
And that will be by using ThirdWeb CLI.
Open your terminal and run this command:
npx thirdweb create
You will see something like this👇

Now it asks what type of project we want to create.
We want to create a contract so we will pick Contract it. Select it and press enter.
Now it will ask you for some details about the project. Go ahead and give those details. For Example 👇
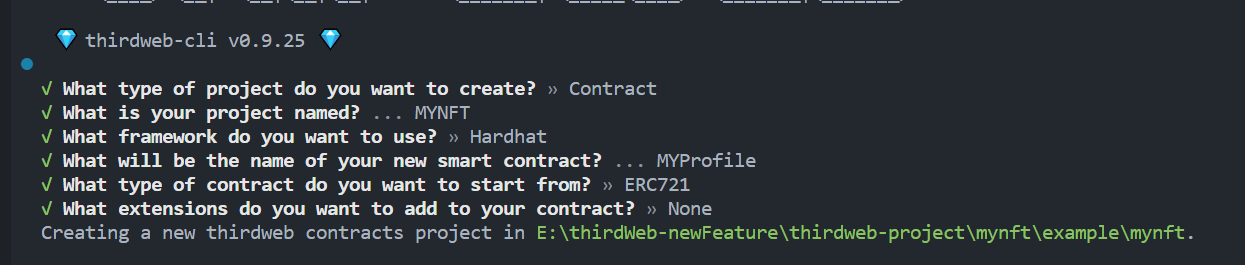
NOTE: for the framework, I am using Hardhat. If you know about the second one, go ahead and select it. But you need to find a way to deploy using it on your own.
We are creating an NFT for my profile picture 😅. I know it is silly but it's for tutorial purposes.
But you are free to create any kind of project.
Now we will have a directory structure like this👇
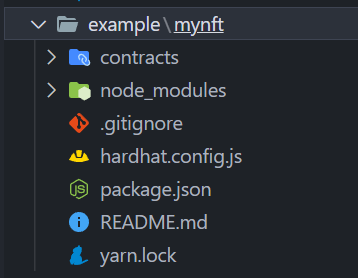
You don't need to know about all of it if you are a beginner. Just follow the tutorial and you will be good to go.
Creating the smart contract
If you did everything according to me, you will get a file named MyProfile.sol
// SPDX-License-Identifier: MIT
pragma solidity ^0.8.0;

import "@thirdweb-dev/contracts/base/ERC721Base.sol";

contract Contract is ERC721Base {

      constructor(
        string memory _name,
        string memory _symbol,
        address _royaltyRecipient,
        uint128 _royaltyBps
    )
        ERC721Base(
            _name,
            _symbol,
            _royaltyRecipient,
            _royaltyBps
        )
    {}

}
If you did something different and didn't get file like this. don't worry, go ahead and create this file in the contracts folder.
Now, we will make some changes to this file. The NFT file we got contains a lot of things that we don't need for this purpose. So I am going to change this file to something like this:
// SPDX-License-Identifier: MIT
pragma solidity ^0.8.9;

import "@openzeppelin/contracts/token/ERC721/ERC721.sol";

contract MyProfile is ERC721 {
    string private constant TOKEN_URI = "<YOUR TOKEN URI>";
    constructor() ERC721("<ENTER NFT NAME>", "<ENTER NFT SYMBOL>") {
        _safeMint(msg.sender,0);
    }

    function tokenURI(uint256 tokenId) public pure override returns (string memory) {
        return TOKEN_URI;
    }
}
Change the NAME, SYMBOL and TOKEN URI.
If you don't know what TOKEN URI is, just follow the following steps:
Go to 👉Pinata and create your account.
Now you will get a dashboard like this👇
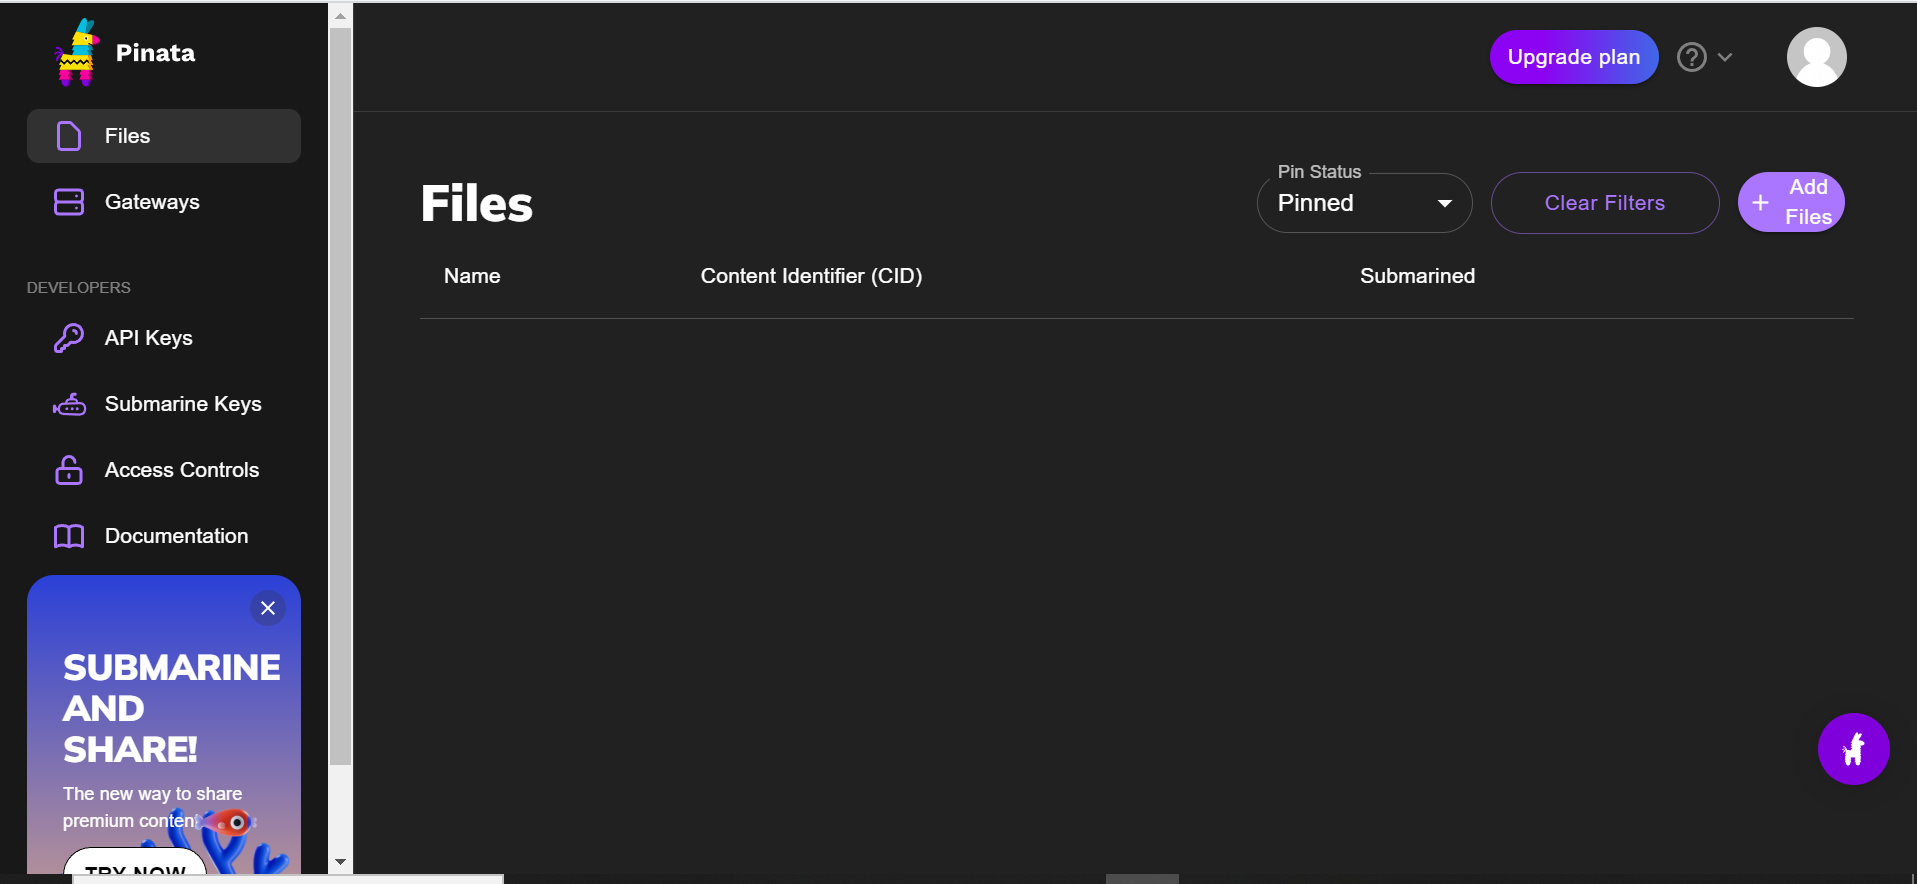
Now click on the Add Files button and select the FILE option from it.
Click on it and select an image of your choice that you want to create an NFT of.
Now simply click on the upload button and it will start uploading on Pinata.
Once you have done it. you will see a file on your dashboard like this. The CID that you see here will be different for your file.

Copy this CID and keep it somewhere for now.
Now we will create metadata that will contain the details about the NFT we are creating. You can simply use this one👇
 {
     "description": "<Give the description about NFT>",
     "image": "ipfs://<PUT YOUR IMAGE PINATA-HASH/CID HERE>",
     "name": "<GIVE A NAME>",
     "attributes": [
     ]
 }
Fill in these details and save it with <file Name>.json
Now we will upload this metadata on PINATA as well.
Go ahead and do it as we did with Image. Now again copy the CID.
Make a URL like this👇
"ipfs://<YOUR METADATA CID/HASH>";and add it to the NFT file.
Compiling and Deploying the Contract
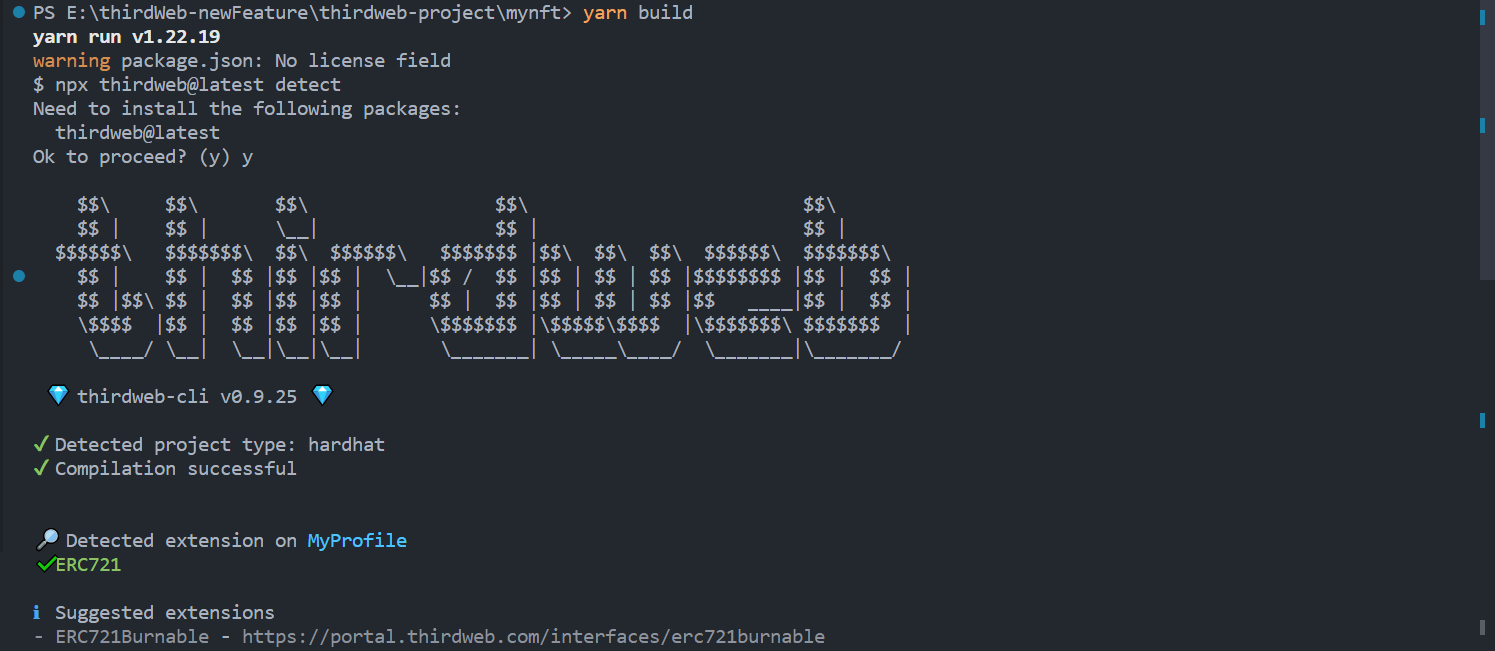
we can simply run this command in the terminal to compile the contracts:
yarn build
you will get result like this👇
Now once it is compiled. Go ahead and run this second command to deploy the contract:
yarn deploy
This will be the result👇

As we can see we get this link at the end. Copy the link and open it in your browser.
A page like this will be opened👇
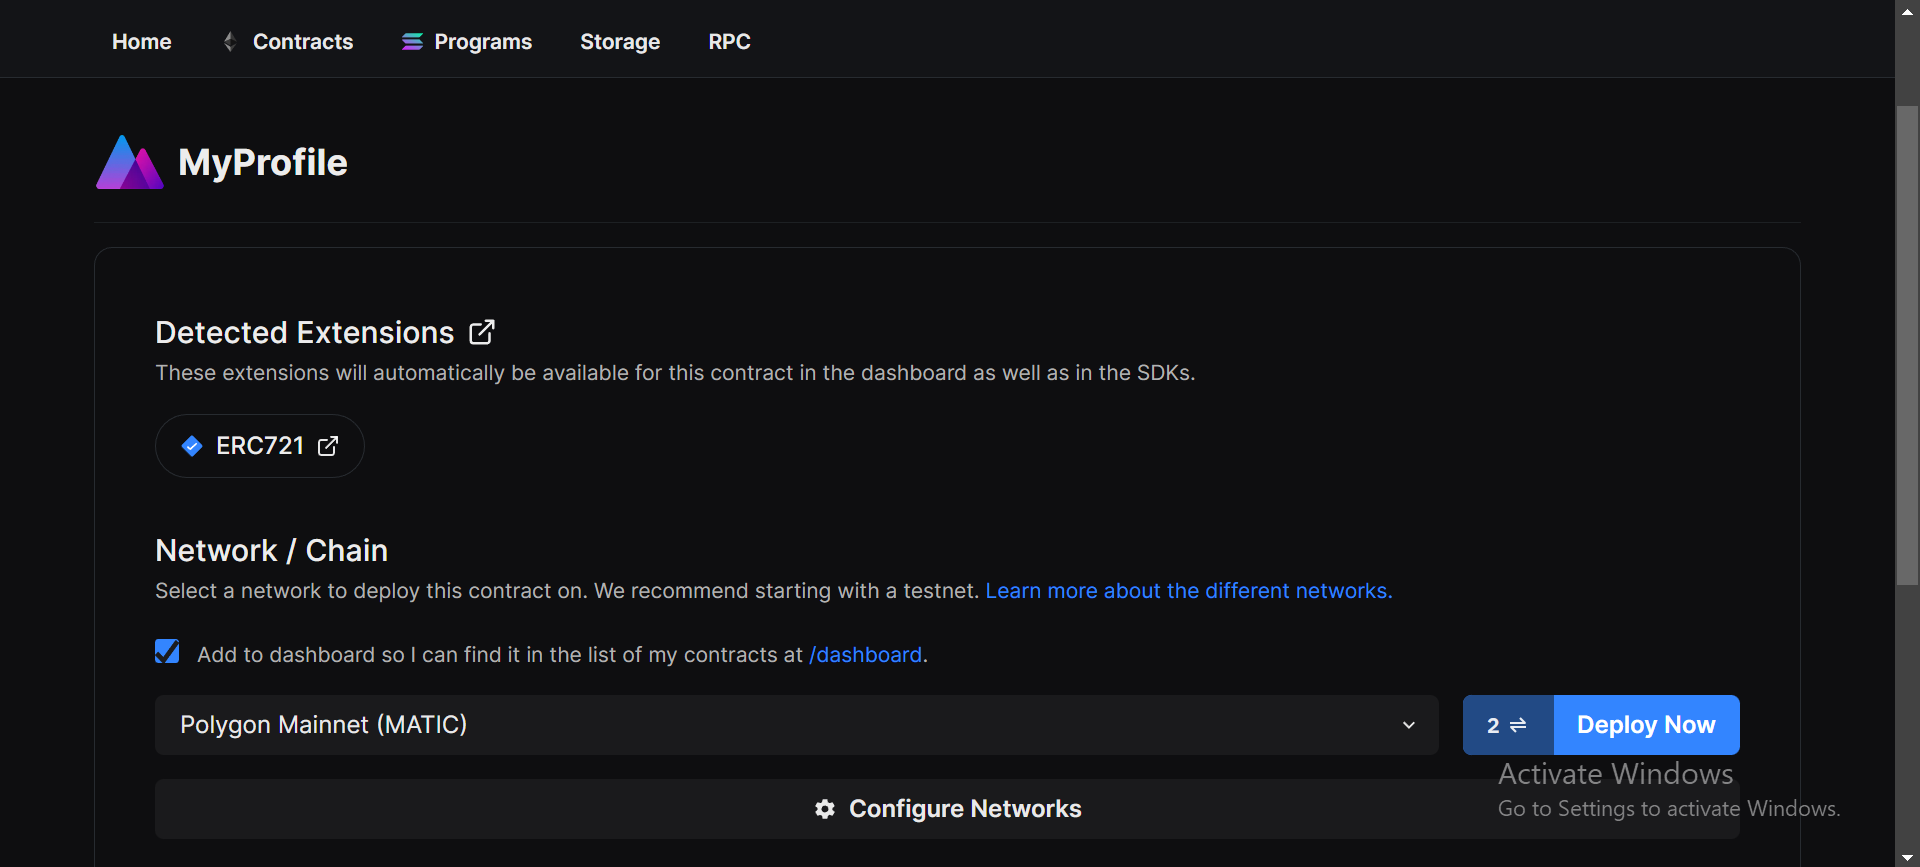
If you already know about Hardhat and doing stuff like compiling the smart contracts and deploying on the chain you might have noticed that we didn't need to give our private key or provide the RPC URL or any other configuration details. This is the power of the ThirdWeb.
Now you can see something familiar that we have seen already in our previous section. From here we need to follow the same steps as we did in Step 4 and onwards of Section 1.
I am skipping this because everything from here is the same.
After doing everything we will get a dashboard like👇 which we also got before:

And we are done with it as well.
We have successfully deployed the contracts in both code and no code way.
My View on New Features:
I have been using ThirdWeb SDKs for quite some time and I am amazed at how the team is providing amazing tools like this in such a short period. The team has created something truly exceptional. The product is impeccable and exceeds all expectations.
It's clear that a lot of thought, care, and expertise went into every aspect of its design and development.
It's truly amazing and there are no apparent flaws that I can see.
Important Links
Link to ThirdWeb Dashboard for deployed contracts:
TOKEN: https://thirdweb.com/polygon/0xCCEf57A16F31A1E5aCEd475bED54e61C0F8Fde67
NFT: https://thirdweb.com/polygon/0xf85369D3080af3d87548aaB7cd1452DA249c2759
Link to Resources used:
THIRDWEB WEBSITE: https://thirdweb.com/
THIRDWEB OFFICIAL BLOG FOR THE FEATURE: https://blog.thirdweb.com/any-contract-any-evm-chain/
PINATA: https://www.pinata.cloud/
it's a wrap
Thank you for reading🙂
